Administrator Install on Unix
Installer wizard GUI launch
To run the Unix installer in Administrator mode the installer must be launched either by root or through using sudo. e.g.
$ sudo bash ~/Downloads/jalview-2_11_4_0-unix-java_8.sh
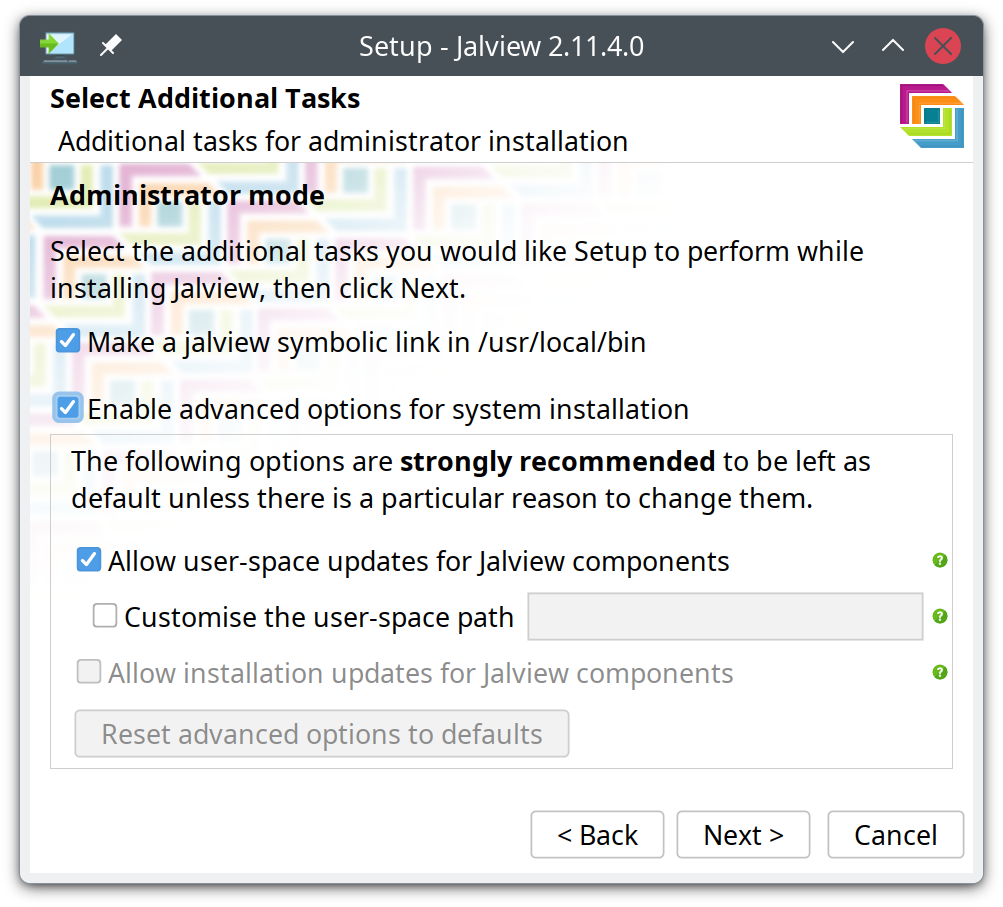
Running in Administrator mode will be noted in bold at the top of the installer. If you don’t see this then the installer is not in Administrator mode.
When running in Administrator mode, the installer has different default values for the installation path and the default path where to put a symbolic link so that it benefits all users.

-
The default installation path is
/opt/jalview. -
The option to add a Jalview icon to the desktop is removed.
-
The path to put a symbolic link is in the system space (e.g.
/usr/local/bin). -
There are more options available in the Advanced options, controlling where and whether automatic updates occur. These apply to all users running this installation of Jalview.
Headless installer
You can run the installer from a console with the -q option, which will install Jalview with all the defaults. You can alter some of these defaults with command line options:
| option | action |
|---|---|
-a folder |
Install Jalview into folder (the same as install4j’s -dir) |
-U |
Disable user-space updates |
-u template |
Install user-space updates into template instead of the default location |
-S |
Disable all updates |
-q |
Run in unattended mode |
For more fine-grained options with an unattended installation (such as changing the default file associations) you can use a response file, documented on the Unix installation page.
Updating the installation
Whilst users may be getting updates to Jalview, the installation will remain the same. This shouldn’t be overly problematic, but at some point a feature of the Jalview launcher (based on getdown) may require a newer version to properly handle launching Jalview from either the installation or user-space copy.
To help with this task, there is now an included update script that will use the Jalview launcher to update the installation files to the latest version of Jalview but without displaying the splash-screen and without actually launching Jalview. This means it can be run headlessly, and even automated to run periodically with e.g. cron.
The bash update script can be found in installation_folder/bin/update.sh, with a symbolic link jalview_update so it can be run from a console as, e.g.
$ sudo /opt/jalview/bin/jalview_updateEnsuring users get the right Java Runtime Environment
The Unix desktop installation of Jalview does not include a bundled Java Runtime Environment (JRE) since this will be different for each Unix architecture.
The current release version of Jalview requires a Java 8 JRE (Jalview Develop currently requires a Java 11 JRE) which you can download and install either through your system package manager, or from an OpenJDK package – we recommend Eclipse Temurin from Adoptium (formerly AdoptOpenJDK).
If the correct version of Java can be found on all users’ PATH then you shouldn’t need to do anything – Jalview will fall back to using the first java that it finds. However, if you need to install a JRE for Jalview you should make a link to the JAVAHOME of that installation in the Jalview installation folder, calling the link jre. e.g.
$ sudo ln -s /usr/lib/jvm/java-8-openjdk-amd64 /opt/jalview/jre